10 Easy Tips for Tighter Drum Edits for a More Natural Drum Sound

Drums are the backbone of your track.
Unfortunately, not all drummers play them the way you’d like them to. If you edit them you can’t make them too robotic – but you can’t leave them too loose either. In this post, I’ll share 10 tips with you that will make your drum edits tighter and more natural than ever.
1) Talk to the band before editing
Find out what feeling the artist is looking for. Should the drums bang on the beat? Be laid back? Give the song a gentle push? Find this out before editing and avoid disappointment later.
2) Group your drum tracks
If you don’t… phase issues will come to haunt you. If your drums lose weight or sound all swooshy when moving a clip around – you might have forgotten to group the tracks.

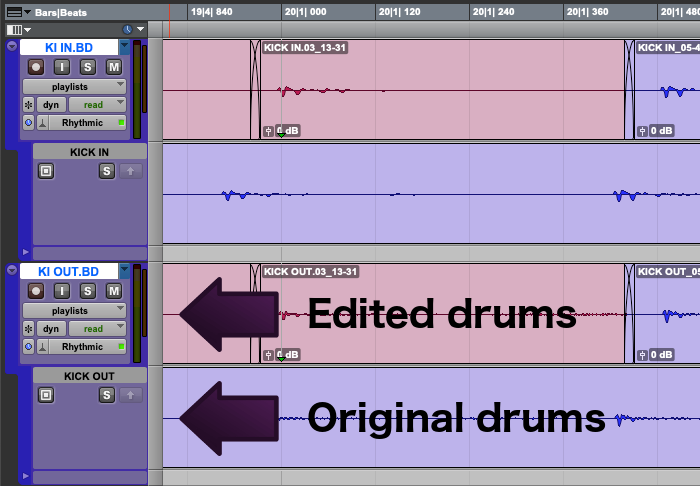
3) Comp the best material from the raw recordings
Select which clips will make it into the mix. Make a comp(osite) drum track out of them. Most DAWs have a playlist or lanes functionality that comes in handy here. Smooth out glitches at transition points with cross-fades.
Comping is the most natural way of editing and will give you the best starting point for the next steps!

4) Have a good listen
Now listen to the whole track with a metronome. Jot your impressions down in a notebook or create markers. Here’s what to listen for:
- Are the drums generally in time or consistently off?
- How about the feeling? Laid-back or pushing? Does this fit the genre?
- Are there any parts that need special attention?
5) Focus your editing on the elements that drive the song
When I started editing I thought I’d need to pull every single drum hit in place. This might be true if your drums are completely out of time. Luckily, more often than not you’ll only need to focus on the elements that drive the song. Nine times out of ten this will be kick and snare – but in certain parts it may be the hat, the ride or even the toms.
6) Create strategic backups points while editing
This makes it easier for you to go back if you mess something up. And you’ll be much quicker to deliver any revisions your client may (err… will…) ask for. The playlists feature I mentioned earlier is once again your friend.
I keep backups of the comp take, the overall performance correction and the final edit pass dealing with fills and more complex problems.
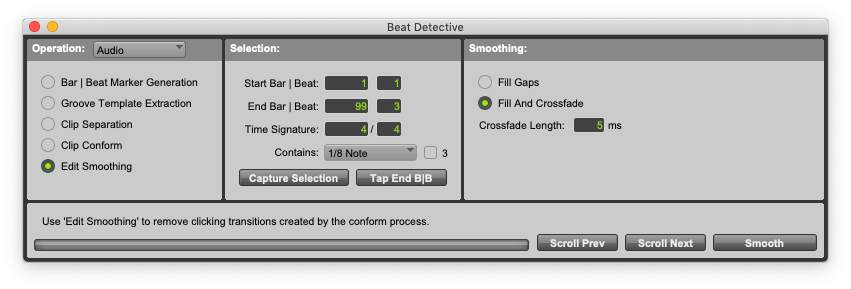
7) Use slice editing instead of time stretching
Most DAWs offer two ways to get audio in time. One uses basic editing operations: cut, slide, trim and cross-fade. Upside: This does not alter the audio quality. Downside: It’s generally slower. The beat detective module in Pro Tools is a good example.
The other way is to use whichever time stretching functionality your DAW offers. This can be lightning-fast – I fixed whole drum performances with a single click. However, your sound quality will suffer.
If you want the best possible sound, use slice editing.
8) Get the quantization right
Don’t overdo it
If you pull the performance 100% to the grid you’ll make it sound like a robot. Instead, find the spot where the performance feels just right. I find that quantization intensities around 50% are a great starting point.
Get the grid right
The quantization grid defines the points in time to which your DAW will align the beats. In many cases, your drummer will use different rhythmic patterns and maybe even switch from binary to ternary rhythms throughout the song. You have to find the grid that matches each different part.
I don’t know how many times I tried to quantize a triplet to a 1/16th grid and wondered why the heck it didn’t work…
Experiment with groove templates
Groove templates are alternative grids created by recording a real drummer’s performance. Quantizing to a groove template can give more organic results than using the standard grid.
9) Fine-tune the feeling with nudge
This is a powerful one. If you encounter a phrase where all the hits seem to be at the right spot but the feeling just isn’t right…
Nudge that part in 10 ms increments to the left or right. Pro Tools users: The “+” and “-” keys on the numeric keypad and a 10 ms nudge setting are your friends.
Close your eyes and feel how every nudge changes the performance. Don’t do this with the mouse – you want to find the right spot with your ears, not your eyes…
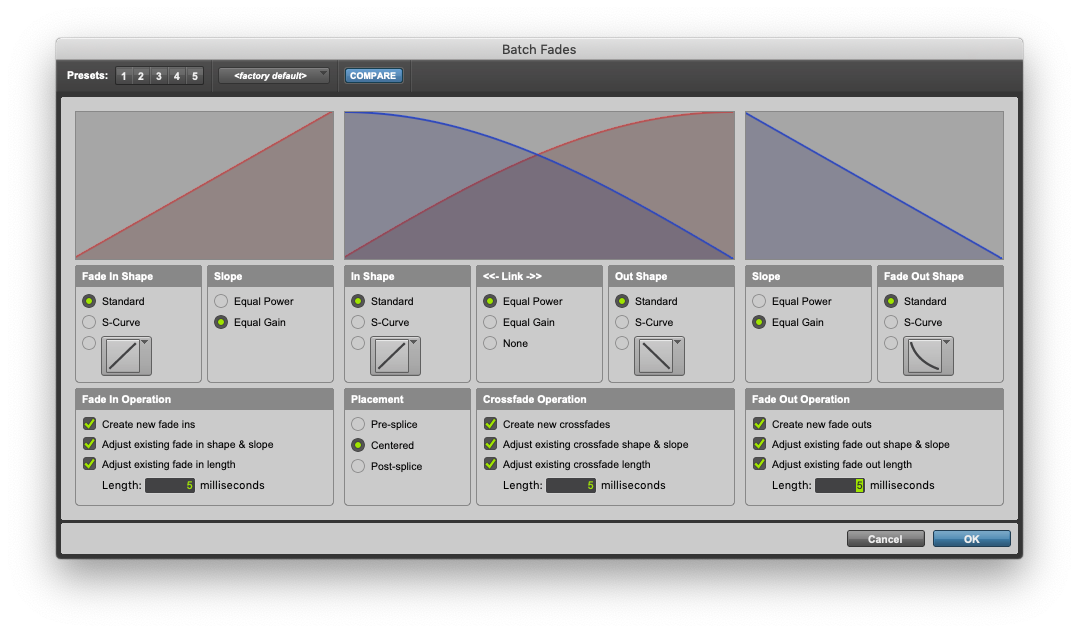
10) Time for the final touches
The last step is to run a batch fade. Start with 5 ms fade length and adjust to taste. Listen out for any duplicate hits revealed by the fades. Correct them by altering fade position and length.
Close the session and come back to it with fresh ears on the next day. Do one or two final tweaks and then… send it off to the client!
About Norbert Weiher
Norbert is a sound designer, composer, and engineer based in Curitiba, Brazil. You can get in touch with him or check out his work at norbertweiher.com.
Audio Production


LEAVE A COMMENT